Recipe of Super Quick Nana's Old-fashioned White Bread
Nana's Old-fashioned White Bread.
Hello, I'm Nadine. Today, I will show you a way to make nana's old-fashioned white bread recipe. Never skip today's recipe. This is a simple recipe to try and is one of my family food recipes. This time, I am going to make it a bit more unique. This is gonna smell and look delicious. Not to mention, it's super satisfying.
Nana's Old-fashioned White Bread Recipe
Nana's Old-fashioned White Bread is one of the most favored of current trending foods in the world. It's simple, it is quick, it tastes delicious. It's enjoyed by millions every day. They are nice and they look fantastic. Nana's Old-fashioned White Bread is something that I have loved my entire life.
Nana's Old-fashioned White Bread is one of the most favored of recent trending foods in the world. It's enjoyed by millions every day. It is simple, it is quick, it tastes yummy. Nana's Old-fashioned White Bread is something which I've loved my entire life. They're nice and they look fantastic.
To begin with this recipe, we have to first prepare a few components. You can cook nana's old-fashioned white bread using 9 ingredients and 13 steps. Here is how you can achieve that.
The ingredients needed to make Nana's Old-fashioned White Bread:
- Get 2 (1/4 oz) of packets active dry yeast (or 4 1/2 tsp jarred yeast).
- Prepare 1 cup of warm water (about 100°F).
- Take 2 cups of milk - scalded then cooled to luke warm.
- Take 3 tbs of sugar - divided.
- Make ready 3 tbs of unsalted butter or shortening.
- Make ready 1 tbs of salt.
- Prepare 7-9 cups of all-purpose flour.
- Prepare of Optional-.
- Take 1 of egg beaten or 4 tbs melted butter.
Instructions to make Nana's Old-fashioned White Bread:
- In the bowl of a stand mixer equipped with a dough hook add water, yeast, and 1 tbs sugar. Stir gently, then allow to bloom untouched 5 minutes. Add scalded warm milk, remaining sugar, shortening, salt, and first 2 cups of flour..
- Turn mixer on to lowest setting until ingredients are just combined. Increase to next speed. Begin adding additional flour 1/2 cup at a time until dough begins to pull away from bowl (mine took about 8 cups today, a rainy Winter day)..
- As soon as dough pulls away stop adding flour and continue running mixer for 2 minutes more. If dough begins to climb hook shut off and scrape down slightly. Then start up again..
- Transfer dough to a greased bowl. Turn once to coat. Cover with a lint free towel and allow to rise 1 hr in a warm spot (I turn my oven on to warm then sit the bowl on the back burner of the stovetop)..
- When dough has risen punch down. Lightly grease 2 loaf pans. Turn dough out onto a lightly floured surface. Divide into 4 equal portions. Gently form each into a ball. Place 2 balls side by side in each loaf pan. Cover with towel and allow to rise 1 hr again..
- After second proof preheat oven to 425°F. Do not punch down dough this time. If desired beat 1 egg OR melt butter and gently brush over the top of each loaf. Gently place pans in oven (careful not to bump pans or drop onto rack). Bake 20-30 minutes or until tops are browned..
- Remove from oven. Let loaves cool 5 minutes in pans. Transfer to a wire rack to cool completely..
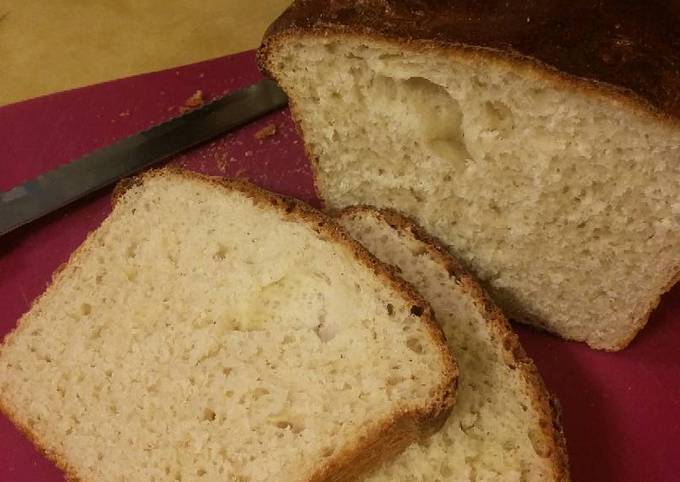
- To serve: Slice to desired thickness (1/2 thick is nice). Spread butter, jam/jelly, peanut butter, drizzle honey, etc. The toppings are endless for hearty homemade bread!.
- See notes below
 .
. - Note 1: You can make this bread without a stand mixer. Mix all ingredients in same way as written above in a large bowl with a wooden spoon. Turn out onto a floured surface and knead by hand for 8 minutes. Continue with remaining steps from there..
- Note 2: It is definitely important to scald the milk as it will contribute to a lighter bread texture. "Scalding" milk means to bring it nearly to a boil, then to allow it to cool back down..
- Note 3: When forming balls, you are not actually rolling the dough into balls. Just pick up a section and gently manuever to shape a ball or your bread may end up too dense..
- Note 4: Be EXTREMELY careful if brushing with egg or butter. Even the slightest excess pressure will cause a loaf to fall and not remain risen while baking. Sadly, this happened with one of my loaves today. No worries, if this happens the bread is still edible, it's just not as pretty. Lol.
So that is going to wrap this up for this exceptional dish nana's old-fashioned white bread recipe. Thank you very much for reading. I am sure that you can make this at home. There is gonna be interesting food at home recipes coming up. Don't forget to save this page on your browser, and share it to your family, colleague and friends. Thank you for reading. Happy cooking.
Tags: Nana's Old-fashioned White Bread Recipe
Food Recipes
Cook Recipes
Cake Recipes

